Use Stryker for .NET code in Azure DevOps
Recently I was at a customer where they where testing running test mutation with Stryker. Mutation testing is a concept where you change the code in your System Under Test (SUT) to see if your unit test would actually fail. If they don’t, your unit tests aren’t specific enough for the SUT and should be re-evaluated. Since Stryker changes your code, they call it mutations and they check if they survive with the unit tests or not. Nice play on words there 😄.
Of course this triggered me to see how this works with .NET code and if we can integrate this in Azure DevOps!

Photo by Suzanne D. Williams
Setting up an example
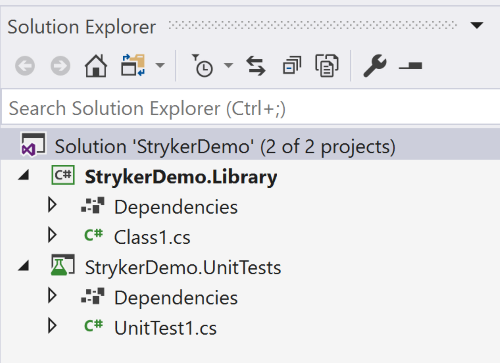
To have a SUT and a set of unit tests for this, I have set up a small C# library with .NET Core and some unit tests to run. I created a solution that only contains what we need:
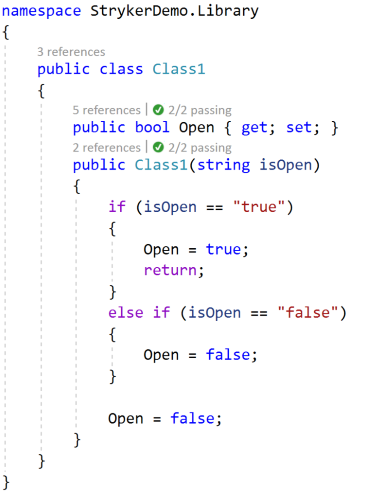
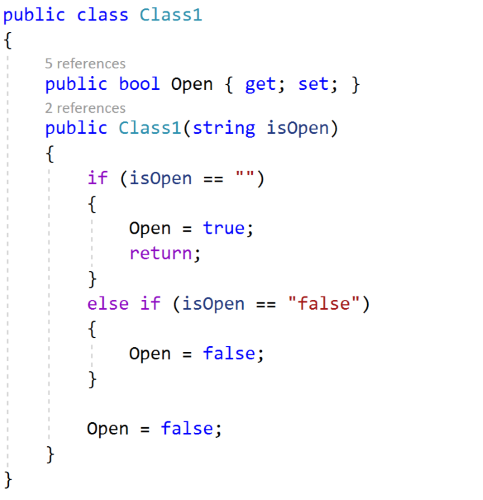
To have something to unit test I added a simple class that would be instantiated with a string and we load that as a boolean value into a property of the class.
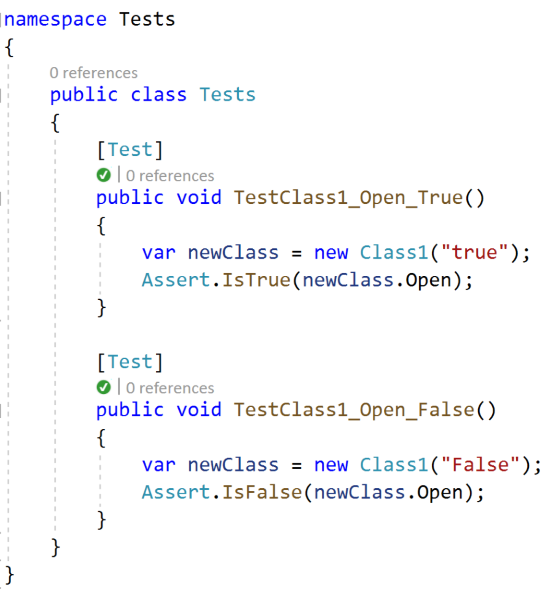
To check if my class setup works, I created two unit tests as an example for both the parameter values ‘True’ and ‘False’. You can probably spot the first issue here: I am using different casings in my unit tests, but they still pass the test runs.
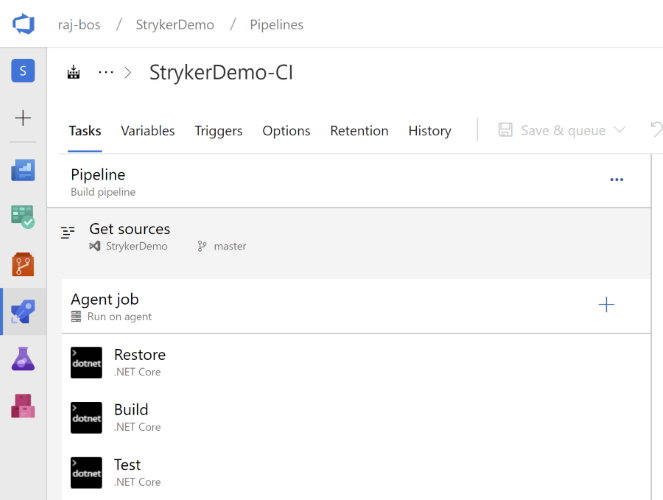
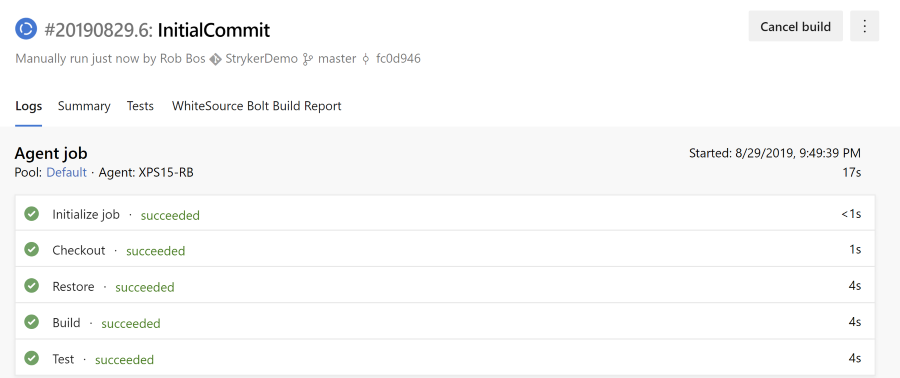
I’ve already set up an Azure DevOps build to trigger on any pushes to the repo, with the default .NET Core template to restore the NuGet packages, run a Build and then run the Unit Tests:
The Azure DevOps build is green with the current set of tests:
Using Stryker for .NET can by done on the CLI by installing the dotnet tool with this command:
dotnet tool install -g dotnet-stryker
I’ve ran into some configuration issues and an older version of .NET Core that I have documented here.
When you run the tool from the CLI, you can see the results immediately and also see the changes Stryker has made to your code.

In the screenshot above you can see that by default, running Stryker in your solution folder will not work. Stryker wants to be run from the folder containing the UnitTests project and will pick it up automatically. It will also find the solution and the project containing the code it needs to mutate. If you need, you can help Stryker find all this by adding some parameters that have been documented here.
Running Stryker in the CLI
Running Stryker from the unit test project directory will start mutating your code and running the unit tests on it again. It will try out all the mutations it can find and then track if it survived all the unit tests (meaning that there was at least one unit test that failed when running against the mutation). The results are visible inline.
dotnet stryker --reporters "['cleartext', 'html']"

Mutations
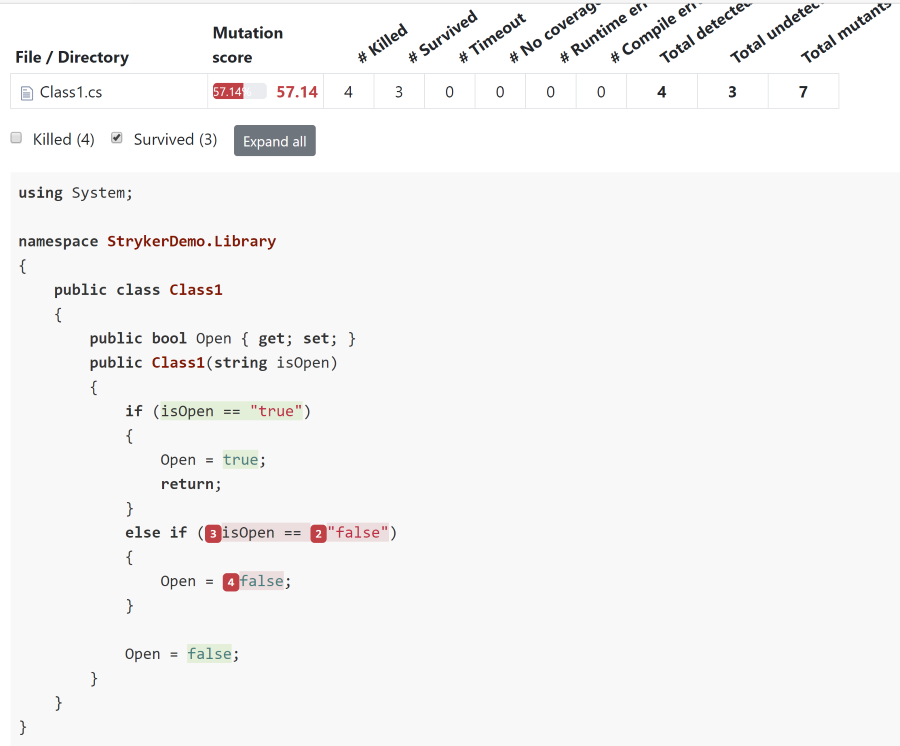
As you can see in the screenshot above, Stryker searches the original code for boolean expressions, strings and other things it can ‘mutate’.
The first mutation in this run was changing the line if (isOpen == "true") into if (isOpen == "") (a string mutation). This mutation is caught by the first unit test and therefore marked as ‘killed’.
Stryker report
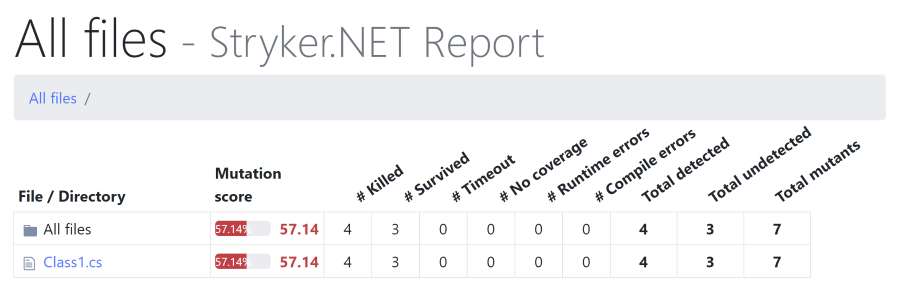
Adding a html report parameter to the Stryker command will write a html file to your disk that can be used for finding the mutations that either survived and where killed.
Summary view
Details view
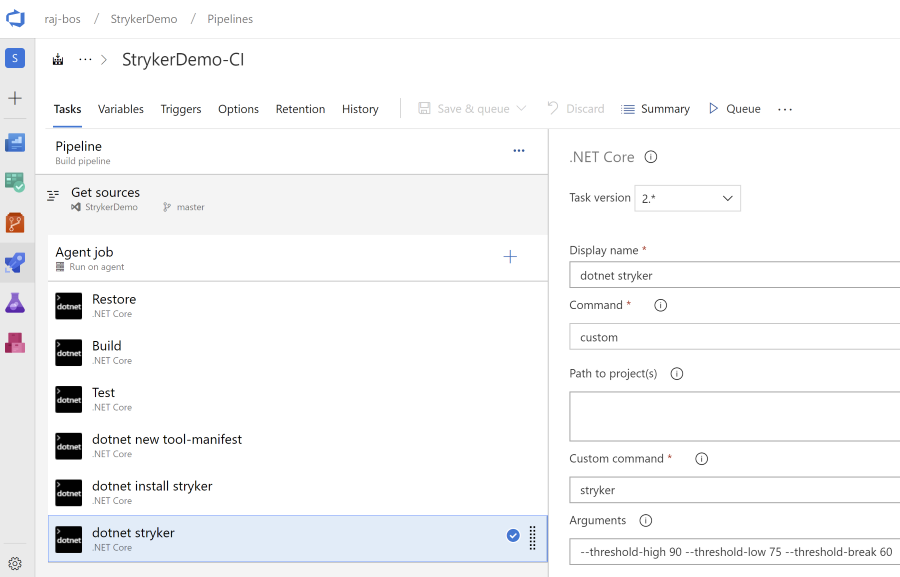
Adding Stryker to your Azure DevOps pipeline
Now you are ready to include a Stryker run into your Azure DevOps build pipeline. To do so, you can include calls to the dotnet tool commands using the normal .NET Core task. If you need help figuring out how to set up the custom commands, read my blogpost about Running dotnet tools in Azure DevOps. Do note the specific arguments I pass into the Stryker command here: my mutation tests where scoring on 54%, so I needed custom thresholds to actually fail the build.
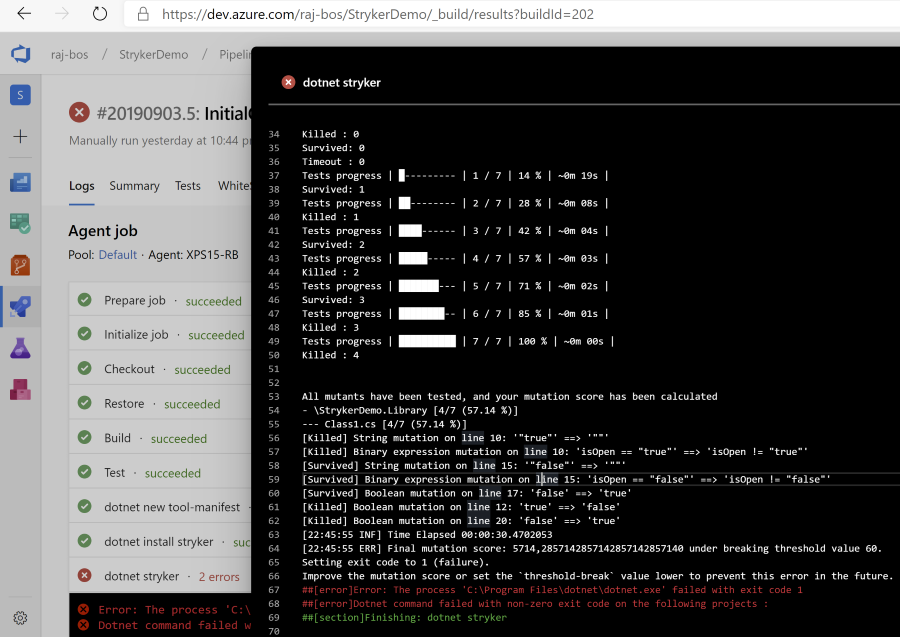
Failed build result
Running Stryker on my current set of tests will actually fail the build because of the custom threshold. This way you can validate your unit tests and actually check to see if there are any outliers that you missed while creating the tests for your code.
Note: mutating your code and running the unit tests again means that your tests will run multiple times. This can add up to quite some additional time that your build needs to run!
Next step
The next step is to include the html report in you build pipeline and upload it as an artifact. You can then download it if you need to check it.
The Stryker team seems to be working on an extension for Azure DevOps to enable the build results to show an extra tab that would open that artefact file, but it seems that this is not yet ready. Keep up to date on this by watching this repository.
Update
Read more information about the setup in Azure DevOps in my follow up post here.
For the final setup with all steps running in parallel in Azure DevOps you can find the end result here.