Running .NET Core tools in Azure DevOps
I wanted to run .NET Core tools in Azure DevOps and ran into some installation issues. I tried installing the tool I needed globally, yet the agent could not find it.
Local tools to the rescue
In the latest versions of .NET Core 3.0 (currently still in preview), you can install tools locally. This means that you can install the tool in the current folder, with its own version and thus independent from other tools or versions on your machine. More information can be read here.
Calling the installation of the tool in Azure DevOps
To actually install the tool (locally) through the .NET Core tasks you need to run the command in a specific way. This took quite some testing to figure this out. I wish this was documented a little better, so here it is for myself in the future 😁:
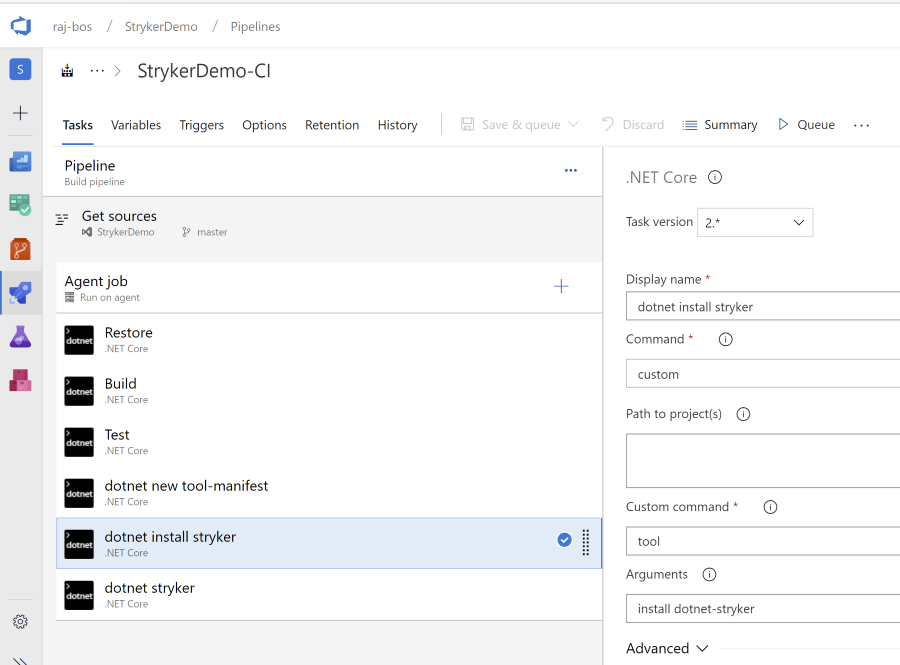
Do note that the custom command to run is just tool and the parameter input gets the name of the action and the tool.
In this case I am installing Stryker to start with mutation testing.
Error: ‘Cannot find any manifests file’
Just running the installation in the work folder will give the error below. .NET Core wants a config file for local tools. Find more information about that here.
Cannot find any manifests file. Searched:
C:\Apps\TFSAgent\_work\7\s\.config\dotnet-tools.json
C:\Apps\TFSAgent\_work\7\s\dotnet-tools.json
C:\Apps\TFSAgent\_work\7\.config\dotnet-tools.json
C:\Apps\TFSAgent\_work\7\dotnet-tools.json
To get a new manifest, add an extra .NET Core task and run this custom command:
dotnet new tool-manifest
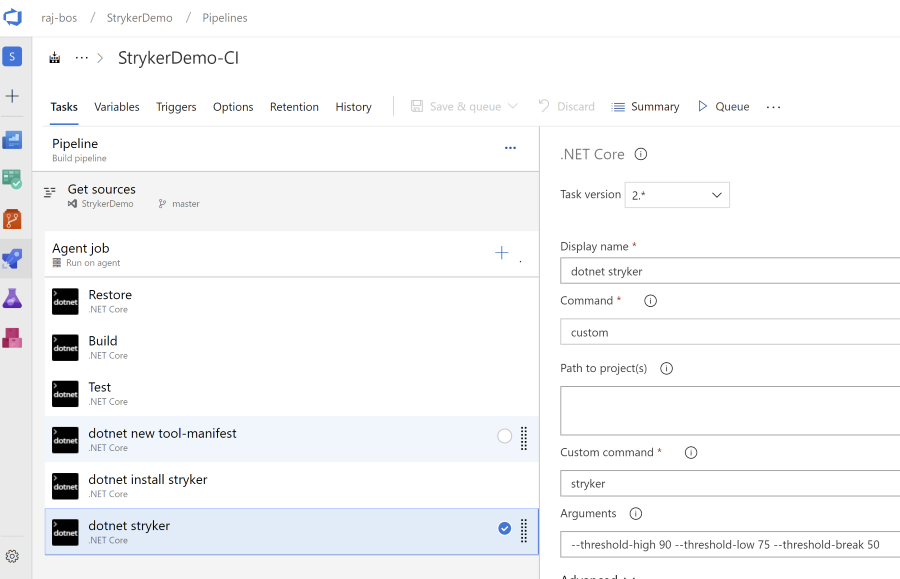
Run the .NET Core Tool
After setting up a manifest and the installation itself, you can now run the .NET Core tool itself by using a custom command again: