Parallelizing a long Stryker Run in Azure DevOps
I’ve been working on a Stryker run for a larger .NET solution (115 projects and counting) and wanted to document on the final setup in Azure DevOps.
You can find more information on what Stryker is and how this can be used on a .NET project with an example on this previous blog post.
In this post you can find how I got to this point: link.

Photo by Dallas Reedy
Final Setup in Azure DevOps
You can find the repository with all the scripts on GitHub. I call these scripts in the Azure DevOps pipelines.
High level overview
See the screenshot below for the final setup. Jobs 1 & 2 will run in parallel since they aren’t linked to any other job as a dependency. This enables us to run multiple Stryker jobs (each with multiple projects!) at the same time. If there are enough eligible agents in the build pool, we can fan out this rather extensive task. Depending on the number of unit tests and the code that is being tested, mutation testing can easily take a while.
Task 3 does have a dependency on the other tasks, so it will run when task 1 and 2 are completed successfully.
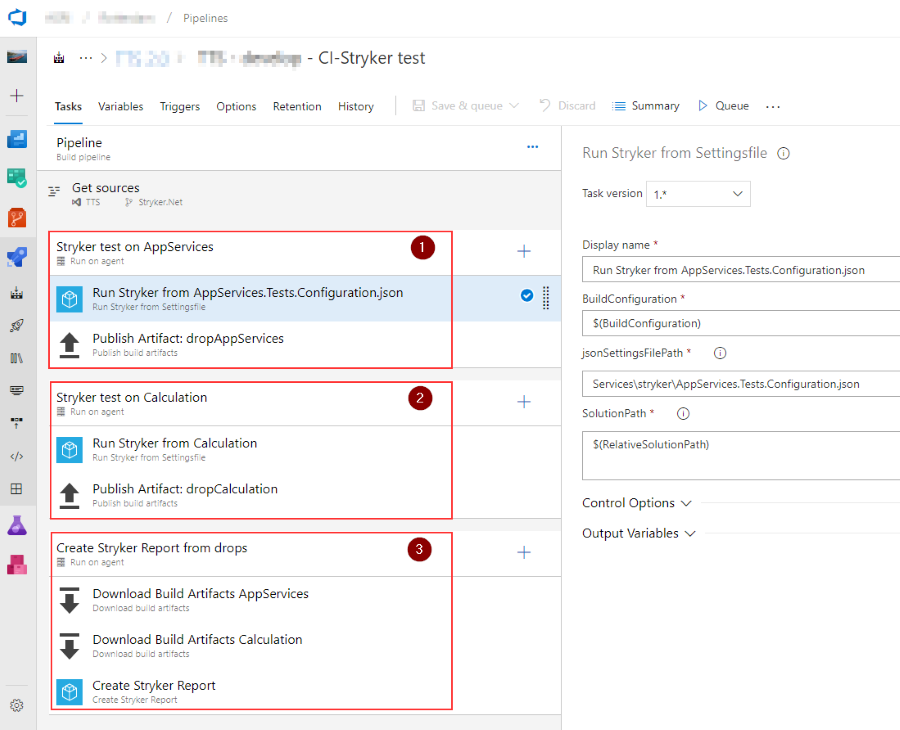
Running Stryker on a set of projects
Job 1 and 2 have the same taskgroup that will run.
Note: read my previous post on the set up I use to run Stryker on a set of projects. This job runs Stryker on all projects in a given folder by creating a specific configuration file for that part of the solution. The next task then uploads all the json files back into Azure DevOps so they will be available for downloading in a later step. This is needed because each agent job will/can run on a different agent and therefore the json files will be generated in a different folder.
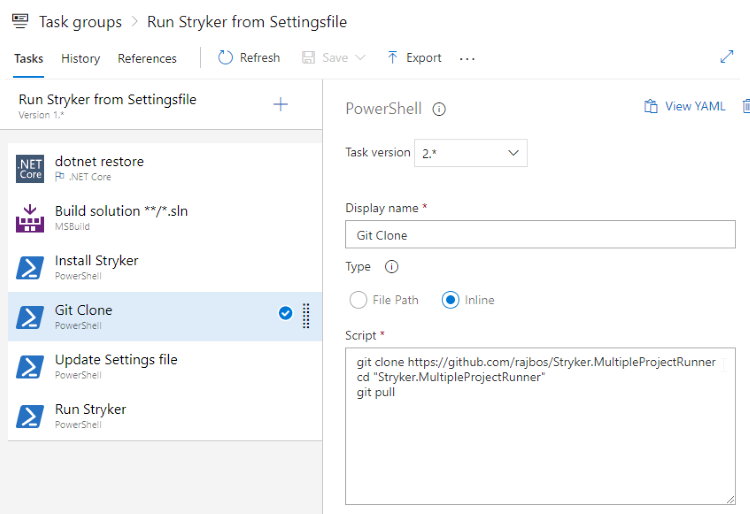 Because each job can run on a different agent, we need to build the solution on each agent to make sure that Stryker can run. I’ve asked the Stryker team why they need this method and to see if we can do that once instead of in each job here. Still, the tradeoff with the ability to run on different agents is worth it. If I can change this setup, I will update this post.
After building the solution I need to make sure that the agent has the Stryker tooling installed. I don’t like to do that on an agent by hand or by baking tools like this into an agent image. I’d rather have the tool installation available in the build itself. That enables us to add new agents to the pool when needed, without us having to do something to make sure all our tooling works. Checking for a .NET Core tools on a server can be done with the code in this GitHub Gist. Using PowerShell I then download the files from my GitHub repository that has all the code we need to run Stryker on multiple projects and join their results. Those results are then copied into the Artifact directory. That way I can pick them up and upload them to the Artifacts linked to this build.
I update the settingsfile here to correct the hard-coded paths in the configuration.json so the tools can find them in the agents source code directory.
Joining the Stryker results
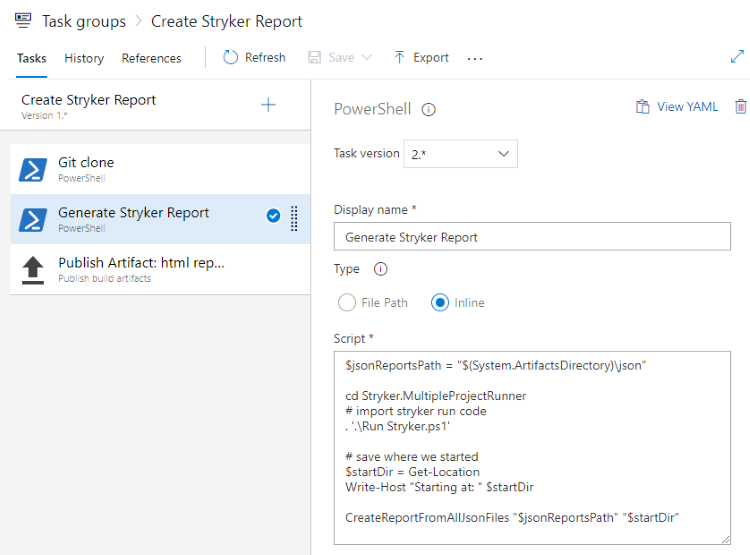 This job will first download all the artifacts from the other jobs so we have them available. By using the same code in my GitHub repository, I can now join those json files and create a new report from it.
As a final step I upload the generated HTML file (self contained btw, very nice) to the artifacts for the build so they can be downloaded and analyzed.
Todo
What I haven’t done yet, is failing the build on a low mutation score. I’m not sure what is helpful here: I could store the results from each run and use the lowest score to verify it against a threshold, or I could try to calculate an overall score from the results files. Unfortunately that information is not stored in the results json, so that is currently not possible. Still, having a (regular) checkup on you unit tests is already a nice improvement to have!