GitHub Actions: Convert from PowerShell to Typescript
I am an avid PowerShell user and have been using it for a while now. Together with C# it is my main development experience these days. That is why I created my first GitHub Actions in PowerShell. Using PowerShell in you actions is possible by running the scripts in a container with PowerShell installed.
I wanted to create the same workflow in Typescript but am not that versed in the language. Together with finding the running in a container somewhat cumbersome (it takes time to pull the image and testing locally needs an extra script). I also found running in a container poses an extra step to use it in a GitHub Enterprise Environment (you probably need to mirror the image internally).
With an Xpirit Innovation Day coming up I had all the reasons I needed (and time available 😅) to create a Typescript version of the same workflow. I started the yak shaving earlier and made sure I had the basics under control so I would not have to find any of that out during the innovation day itself:
- have a running example of a typical GitHub Action
- with a way to test it in my IDE (VsCode)
- with a way to read inputs and a way to inject them for testing in the IDE
- have logging under control, so I can see what is happening while running
- have a way to output the results so they can be used in the next action in a workflow
- know how Typescript pass stuff like arrays back and forth between methods and how to loop over them
This post will be about my learnings moving from PowerShell to Typescript.
Getting started
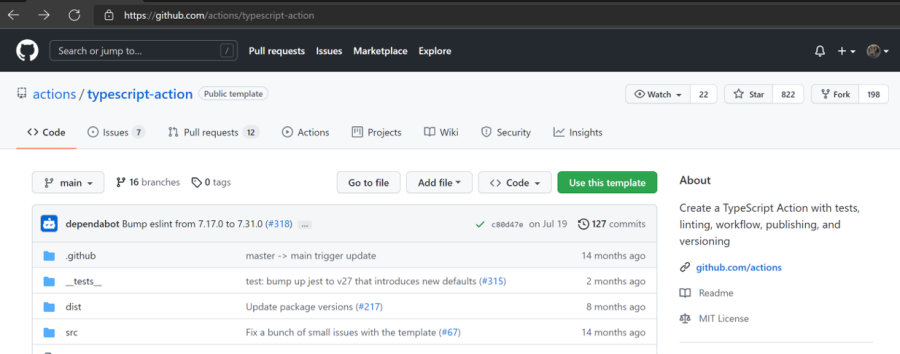
To get started I recommend looking at the example repository actions/typescript-action. It has been setup as a template, which means you can click on the use this template button and you are good to go.
Learnings: Typescript
Converting to Typescript definitely took some time for me. The language is locked down regarding types and usages of things you declare:
- If you declare a variable and don’t use it: you’ll get a compiler error.
- If it cannot figure out what type an object is, you’ll get a compiler error.
- If a variable could be null or undefined, you’ll get a compiler error using it. When you add a null check first, the compiler error goes away. All in all it reminds me much of C# 8’s nullable reference types: you are forced to make sure you are handing the nullable objects correctly which is nice, but can add a bit of a burden when you are new to the language. I also found out my head already declares things that I’ll need later on and then the IDE starts complaining that it isn’t used yet. It also seems to stop compiling further ahead of the error, which I don’t like.
The template also has ESLint configured, which I think is a good thing. It is a linter that checks for some common mistakes and helps you to fix them. It also has a code style checker that helps you to fix the code style. The style checker feels a bit enforced and gets in the way of typing: you cannot see if you have a compiler error at hand or that it is a linting violation 😢.
Typescript needs compilation to run
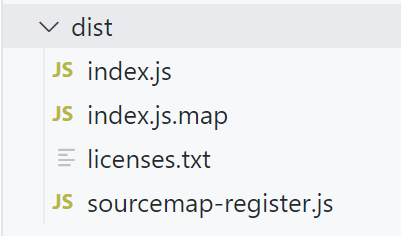
GitHub Actions in the end runs a NodeJS script. To enable Typescript to run, you need to compile the script to a JavaScript file for things to work. For this you can use @vercel/ncc to compile the script into the dist folder. Then you need to add the dist folder to the repository and push it to GitHub for things to work. Adding compiled code to the repository off course goes against my DevOps heart, but this is how it works for Actions: it could directly be checked out by adding a commit SHA or the branch name to your uses statement, as you should and then it is expected to still work.
Octokit
The Octokit library is very useful to make the GitHub API calls. It wraps the GitHub API by leveraging the official REST API Description for GitHub. For example connecting to the API with authentication is very straight forward:
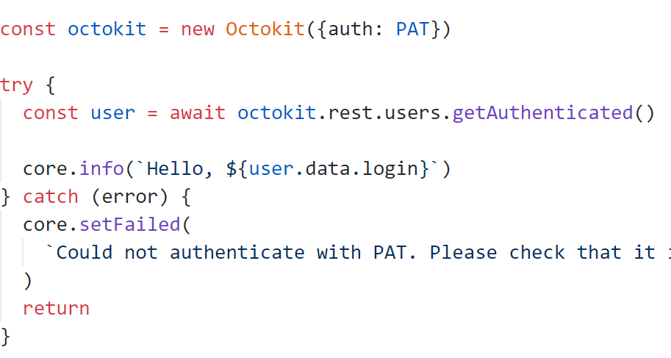
In PowerShell I had to wrap all calls to use my own authentication setup and convert the PAT to a Base64 encoded header. It’s working, but Octokit saves me all that trouble 😄. Similarly handling API rate-limiting is handled for you, so you don’t have to worry about it.
Octokit and inputs
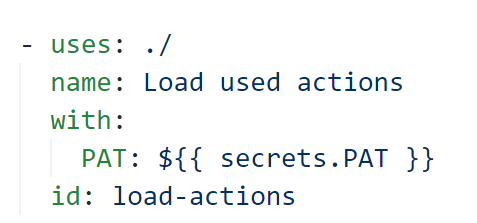
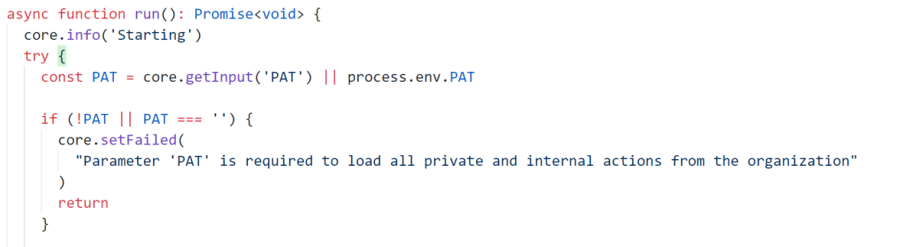
You can declare inputs in your action that the workflow can inject as parameters for your action. Getting the values of the parameters at runtime is build into Octokit, but injecting them during debugging is not. You can use the environment variables from the NodeJS process to still load them.
Octokit and pagination
I already have more than 30 repositories in my user account, which means I have to make calls to getRepos already implementing pagination to get all the results. In PowerShell this meant wrapping my calls, check for the pagination headers and handling them properly. Then I needed to stitch all the results into one list and return that to the caller.
In Octokit this is done by added octokit.paginate() around your call and you are done!

Octokit and debugging/logging
During debugging locally, I would like to see the messages being logged for the user during the execution, to get an idea of the context we’re working in. The library has concepts for logging with different levels:
- core.info: for general information
- core.warning: for warnings
- core.setFailed: for logging an error and stopping execution
The
corecalls work nicely during the execution of a workflow, but they don’t show up in the debug console! That is not helpful. The only thing that you can do to still get output in your debug console is to fall back toconsole.log.
Summary
Overall the experience was smooth: the main issues I had was with using Typescript instead of PowerShell. Luckily adopting a new programming language is made easier if you have a good grasp of the core concepts, so you can search for how to do a for loop in a new language, or using Promises, immutable data structures, etc.
The actions/typescript-action template is very complete and can be used out of the box. I also noticed the execution of the action is much faster when using Typescript. Of course, the container doesn’t have to be pulled, but also all my handling in PowerShell with authentication, pagination and checking if we’re not hitting the rate limit is much faster.
Iterating through 36 repos (at the time), checking all repos for an action.yml or action.yaml file, parsing the yaml and storing the information in an array when from 35 seconds (PowerShell) to 6 seconds (Typescript).
Using the Typescript template also had unit tests installed, which I could do in PowerShell as well, but never did. Let’s see if I’ll use them now 😄. Still, the ultimate test is including a workflow in your repository that will run your local action and check if it works.